Search This Blog

Labels

Sunday, December 8, 2013

non GMO Popcorn Heritage

This HEIRLOOM popcorn was shared by Native American with a pioneer family in the 1850's and enjoyed for generations.  Nearly forgotten and almost lost until Farmer Gene and his family in Iowa revived this all natural non GMO popcorn from past.

Sugar Nannys is proud to offer this popcorn as a drizzle or dip for our Caramel popcorn enthusiast.  
Grown in Iowa by a husband and wife team.  
One bag will serve 2+ people.  99% of all kernals pop.  Simple directions included.
Tiny but mighty Popcorn non GMO heritage Popcorn


non GMO goat milk soap Orange/Clove oil


 non GMO goat milk soap made with sunflower seed oil, flax seed oil, castor oil, orange oilclove oil, REALorange peel and of course lye to make it soap.

Thursday, October 10, 2013

Amish made Oven rack Push and Pull tool

Kitchen, oven rack, tool, bbq  Only $2.00Kitchen tool, pulls, pushes, hot ovens racks, handmade, amish
Amish crafted, handmade oven rack tool, tool pushes the HOT rack in and pulls the hot rack out with very little effort. Much easier to use than a pot holder or oven mit. It also has a little hole at the end to hang it from when not in use. Very convenient and a crafty kithcen tool. I saw this in Matties mothers kitchen and I asked what it was and they told me and I thought "WHAT A GREAT IDEA"! I LOVE this item. It would be a neat a different item for a restraunt to sell with their logo on it and the price is GREAT!

Sunday, September 1, 2013

Benefits of oil pulling

Oil pulling is an ancient Ayurvedic practice that uses pure oils to pull harmful bacteria, fungus, and other organism out of your teeth, gums and throat. This natural remedy not onlyimproves oral health, but it’s also used to prevent and reduce a number of different health concerns.
When swished around the mouth and in between the teeth, the antibacterial properties of the oils absorb toxins from the saliva, reduce the number of germs in the mouth, and help prevent bacteria from sticking to the walls of the oral cavity. 
Benefits of oil pulling for oral health
Studies show that this simple cleansing process can whiten teeth, strengthen gums, and help heal and prevent oral health issues such as:
  • Cavities and gingivitis
  • Plaque
  • Bad breath
  • Bleeding gums
  • Sensitive teeth
  • Dryness of lips, mouth, and throat
Other benefits of oil pulling 
Oil pulling is also used to treat and prevent health conditions beyond the mouth. Some of the benefits may include:
  • Reducing inflammation
  • Seasonal allergies relief
  • Headache relief
  • Reducing chest congestion
  • Detoxifying the body of harmful metals
  • Certain skin conditions like eczema
  • Supports healthy kidney function
  • May relieve ulcers and diseases of the stomach
How to do oil pulling:
  1. Put 1-2 teaspoons oil into your mouth. The recommended oils for this practice are sesame oil, organic coconut oil, or sunflower oil.
  2. Swish the oil for 20 minutes. This will allow the oil to break through the plaque and start reabsorbing the bacteria. First the oil will turn into a thin, white liquid. Then the oil will get thicker and more opaque as it continues to mix with saliva and absorb the toxins. If you find it difficult to swish for 20 minutes at first, that’s ok! Try for 10-15 minutes and then eventually build up to 20 minutes.
  3. Spit out oil. After 20 minutes have passed, you’re ready to spit the oil out. It’s very important that you do not swallow the oil—it’s full of toxins! It’s best to spit oil out in a plastic bag or paper towel. Spitting the oil in your sink can clog your pipes.
  4. Thoroughly rinse your mouth. After spitting the oil out, rinse your mouth out with salt water or apple cider vinegar to make sure all of oil is removed.
  5. Brush well. This last step will kill any remaining bacteria and ensure your mouth and teeth are clean.
It’s recommended to make oil pulling part of your daily routine for optimal results. Although any time of day will suffice, experts agree that it is best done in the morning before eating or drinking anything.

Benefits of CELERY

How to build your own outside pizza oven


http://sustainablog.org/2010/03/how-to-build-your-own-cheap-outdoor-pizza-oven/2/

Sunday, July 14, 2013

EGGS, REAL FARM EGGS

This is what an egg should look like and it is actually darker orange than this because it had already
started to cook.  I cook my morning eggs in coconut oil, banana peppers and a bed of spinach.  I sprinkle tumerick over it when it is done.

I have one Rhode Island hen and she is a free range that only forages.  She drinks a lot of fresh goat milk in the morning.  It is cute.  I put fresh goat milk out for the cats when I am milking and she makes sure she is the first one there.  She really rules over the barn.

Tuesday, July 9, 2013

non GMO goat milk orange/clove oil soap

non GMO FRESH goat milk from my own personal girls.  The soap is made with whole goat milk, flax seed oil, sunflower seed oil, castor oil, orange oil, clove oil, orange peel and of course lye to make it soap.  It will be full of lather.  check out www.sugarnannys.com for additional products

Remember it doesn't matter how well you feed you body because it only takes 26 SECONDS for chemicals to be absorbed into you blood stream.  So why use anything BUT non GMO soap on the largest organ of you body.

Monday, June 17, 2013

Loose Mineral feeder DYI for goats

My project for this coming weekend.  You may put loose salt, baking soda, kelp or make one for each one of your minerals.  Great for goats.

Friday, May 17, 2013

WEIGHT LOSS that actually WORKS

Very simple concept but it really works.  I have also seen this on Dr. Oz.  Your ACTUAL weight times 12 equals how many calories your body actually burns in a day.  How SIMPLE!!

So you weight 125 x 12 = 1,500 and that is how many calories your body burns a day.  So if you want to loose weight eat less than 1,500 calories a day and you will.  BUT you NEVER go below 1,200 calories or your body will tell its self that you are starving and preserve your fat. 

Oh, another important fact to weight loss is to take one day off a week and eat whatever.  That is VERY important it will shock your body and put you back in the weight loss mode each week.

Ok now let me know how it works for you!

Tuesday, May 14, 2013

CARAMEL non GMO

CARAMEL non GMO  support your AMERICAN DAIRY GOAT FARMER

Sugar Nannys' Caramel or Deluche de leche
Caramel is made with FRESH goat milk, cane sugar, organic corn starch and baking soda that is aluminum free and A LOT OF LOVE!! The container is 6 ounces. People RAVE about the flavor of our caramel. Use your imagination and create your own favorite food or drink to drizzle or dip Sugar Nannys Caramel over and share your ideas. Here are some of the ideas we have come up with caramel in coffee, over ice cream, drizzled over squash, as a fruit dip, as frosting for cup cakes and even on a spoon It is made fresh and shipped out that day or the following day so I will ask you to email me sugarnannys@gmail.com so we can discuss your shipping date. Refrigerate after opening.   CHECK OUT WWW.SUGARNANNYS.COM
 

Thursday, April 18, 2013

Making Dried Tomato Powder

Making Dried Tomato Powder

  1. Dry your tomato crop as usual either sun-dried or in a dehydrator.
  2. Store the dried tomatoes in a freezer bag in the freezer for about a week. This is a “just-in-case” measure to kill off any bug eggs that may be hiding in your tomatoes.
  3. Set up the blender.
  4. Remove the tomatoes from the freezer and transfer immediately to the blender. If you have more than one blender full, do this in batches. The idea is to grind up the tomatoes when they are frozen and fragile as glass. This approach gives you the finest powder.
  5. Transfer the tomato powder to a glass container with a tight-fitting lid.
  6. Store in a cool place, away from direct sunlight.

Using Dried Tomato Powder

1K+Follow Me on PinterestHere are some ideas for enjoying your tomato powder:
  • In simple soup.
  • Add it to a more complex soup that is crying out for more tomato flavor.
  • In enchilada sauce.
  • Sprinkled over ground beef as it is cooking or in hamburger patties as they are being formed.
  • In salad dressings.
  • Sprinkled over fresh vegetable juice.
  • In vegetable dips.
  • An addition to pasta sauces of all sorts, including spaghetti sauce for a more intense tomato flavor.
  • A sprinkle into scrambles eggs before cooking.
  • A sprinkle over cottage cheese with cucumber and green onion, sea salt and sumac

REAL Coconut Mounds

Healthy Homemade Mounds Candy Recipe
Ingredients
Step 1: Using a small saucepan, gently heat coconut oil and shredded coconut on low heat. The shredded coconut will begin to “puff” up after a few minutes in the warm oil. Remove from heat and set aside.
Step 2: In a food processor, process dates, vanilla and salt until creamy and smooth.
Step 3: Mix coconut mixture with date mixture. Pour into a small, bread loaf size pan. Place in freezer for an hour or until set.
Step 4: Gently heat dark chocolate in a small saucepan on low heat. You can also use a double broiler to melt the chocolate. While chocolate is melting, cut the coconut candy into “mound” size pieces.
I cut mine into even squares, then cut them in half again. These taste great without the chocolate too!
Step 5: Dip coconut candy into melted chocolate and then place them carefully on parchment paper. Refrigerate the candy until it is set, 30-45 minutes.

Monday, March 4, 2013

Tilly the Goat Princess my new childrens book

I would like to present my FIRST childrens book.  It goes to print today.  I am so excited.  Just wanted to share. 

A litte update:
The book does have its own website www.tillythegoatprincess.com .  You may order the EBOOK from www.tillythegoatprincess.com and the soft cover book from me www.sugarnannys.com .
THANK YOU FOR SUPPORTING YOUR AMERICAN DAIRY GOAT FARM

Friday, February 8, 2013

Fermented Orange Juice


Lacto-Fermented Orange Juice (an Orangina-like beverage)
  • Take 1 quart mason jar.
  • Add approximately 2 1/2 cups fresh squeezed orange juice (I cheated and bought the fresh squeezed oj at the store instead of juicing my own)
  • Add 1/2 tsp powdered culture starter (or 2 tbsp whey)
  • Fill with approximately 1 cup room temperature filtered water, leaving 1 inch or so of headspace.
  • Cover tightly , give a quick shake to mix and leave at room temperature for 48 hours.
  • Refrigerate and enjoy!
  • Be sure to open carefully as gases do build up during fermentation!!
***Update: if your kitchen is warm, it may ferment faster. Look for pressure on your lid and bubbles. 48 hours worked fine in my 70 degree kitchen with halogen under-cabinet lights turned on.
Also, it really should be fresh squeezed orange juice, not from concentrate and not things like the refrigerated 100% juices. They may turn out tasting a bit different. Click here to read more on bottled orange juice.
Variations:
  • I did the same process except used all oj (no water). This turned out great, but it fermented much quicker…24 hours. This was a little bit more ‘sparkly’ but I felt I could get more for my dollar by doing the recipe above with added filtered water.
  • Instead of all orange juice, you could do a mix of mostly orange juice and add a bit of grapefruit, lemon and mandarin juice to get closer to the Orangina flavor.
  • You could easily double this recipe and use a 1/2 gallon mason jar if you wish.
  • If you like to imbibe every now and again, this is AMAZING with vodka ;)

Dehydrator Recipes eCourse


This week we’re going to stray from the norm (me featuring a recipe from the link-up below) and instead I’m going to tell you a bit about the new GNOWFGLINS Dehydrating eCourse which begins January 8th – and give you a chance to win access!
I am beside myself with excitement that Wardeh has decided to offer this course for us! This is a wonderful time of year to pull out those dehydrators and put some moisture back in the air.
What I love about dehydrating foods is that it’s really fool-proof. With canning, you have to be sure the method is done with precision or you could end up with failed batches (food poisoning or just throwing them away).
Dehydrated foods take up less space than canning jars, and since you are not boiling all the vitamins and enzymes out of your foods, they are more nutrient-dense, too.
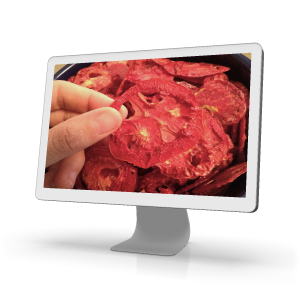
The aroma of dehydrating foods is warm and inviting (okay, unless you’re doing up a batch of onions), and the extra warmth coming from the machine is helpful on these cooler, winter days.
I can’t wait to learn how to make my own instant rice, powdered yogurt, and other foods beyond typical dried fruit and jerky.

Lessons and Topics for GNOWFGLINS Dehydrating eCourse

  1. Why Dehydrate?
  2. Dehydrating Equipment and Tools
  3. Sourcing Food and Overall Drying Methods
  4. Storage Methods
  5. Fruits — Whole and Sliced
  6. Fruits — Pureed
  7. Fruits — Candied
  8. Vegetables — Sliced, Diced, and Shredded
  9. Vegetables — Pureed
  10. Herbs
  11. Beans
  12. Grains
  13. Eggs and Dairy
  14. Broth
  15. Meats — Cooked, Shredded, Cubed, plus Jerky
  16. Meats — Traditionally Dried and Cured
  17. Cooking with Dried Foods — Breakfast
  18. Cooking with Dried Foods — Main Dishes
  19. Cooking with Dried Foods — Desserts
  20. Cooking with Dried Foods — Trail Foods
  21. Fermenting with Dried Foods
  22. BONUS! TBA

What’s in the eCourse?

21+ video lessons with printable tutorials and recipes. As I do with all of Wardhe’s eCourses, I print them out and slide them in page protectors and put in a binder. This way, I can bring it in my kitchen and keep the papers clean and dry.
You also get access to the forum for any support you may need in your dehydrating journey.

PLUS access to all classes!

I love that the way it works over at GNOWFGLINS is when you purchase a subscription you get access to ALL classes. I have learned to much from taking Wardeh’s classes – everything from Fundamentals to Cheesemaking to getting your kids involved.
You can purchase a subscription for as little as $8 a month. A steal of a deal!

Materials Needed

A dehydrator!
Currently, I am using a Nesco dehydrator, but this month I will be purchasing this LEM 10-Tray Dehydrator, which is similar in style to the Excalibur, but is around $50 less. I’ll be ordering it in three weeks and will update you with how I like it once I get it and use it!
Although my Nesco works fine, I like the option of pulling out all the trays and using the warmth to make large batches of yogurt and helping my dough to rise. And with all the trays I’ll have more than double the room.

It’s also nice to have a mandoline slicer available for evenly sliced chips - be it beets, sweet potatoes, summer squash, or zucchini.

Enter to WIN a month’s access!

Enter to win a month’s access to the GNOWFGLINS Dehydrating eCourse – and all the eCourses – by using the rafflecopter widget below…


Link Up Your Recipes!

You can continue to add your dehydrator recipes to the link-up below, and I’ll feature another next week!
1. Zucchini Chips
2. Chai Granola
3. Dried Onions
4. Pineapple Candy Chips
5. Vegetable Chips
6. Sun Dried Tomatoes
7. Greens Chips
8. Chocolate Coated Almonds
9. Dehydrated Broth
10. Make Your Own Beef Jerky
11. Homemade Kale Chips
12. Apple Chips
13. Sprouted Whole Wheat Crackers
14. Chili Lime Almonds
15. Dried Homegrown Basil
16. Tomato Powder
17. Raw Cheez Itz
18. Banana Taffy
19. Grassfed Beef Jerky
20. Zucc-Raisins (Dehydrated Zucchini Candy)
21. Pecan Pie Cinnamon Rolls
22. Organic Sweet Potato Chips
23. The Mini Carrot Cake
24. Cinnamon Walnut Crunch
25. Sweet & Tangy Dried Mango Slices
26. Pizza-chini
27. How to make fruit leathers
28. Cinnamon Aple Crisps
29. Sweet Bread
30. Zucchini Bread
31. Veggie Burgers
32. Flax Crackers
33. Fruit Chips
34. Corn Chips
35. Garlic Herb Beet Chips
36. Carrot Straws
37. Tomato Powder from Dried Tomatoes
38. Pumpkin Spice Cookies
39. Apple Chips
40. Raw Dehydrated Pancakes
41. Zucchini Fries
42. Mushroom Bouillon Cubes
43. Flax Seed Crackers
44. Raw Date Cookies
45. Raw Lemon Coconut Cookies
46. Raw Soaked Granola
47. Dried Persimmon
48. Preserving Ginger